Technology

Helio Additive helps your slicer make better decisions by understanding one thing most print failures have in common: heat. We use a first‑principles, physics-based engine to predict how a part will heat and cool while it prints, then optimize the plan so you can go faster without pushing materials outside their workable range.

Helio does not use AI for these predictions, and we do not train on customer data.

This page is the “how it works” overview for a general audience. If you want the deeper technical details, we link out to the wiki at the bottom.

The big idea: parts remember heat

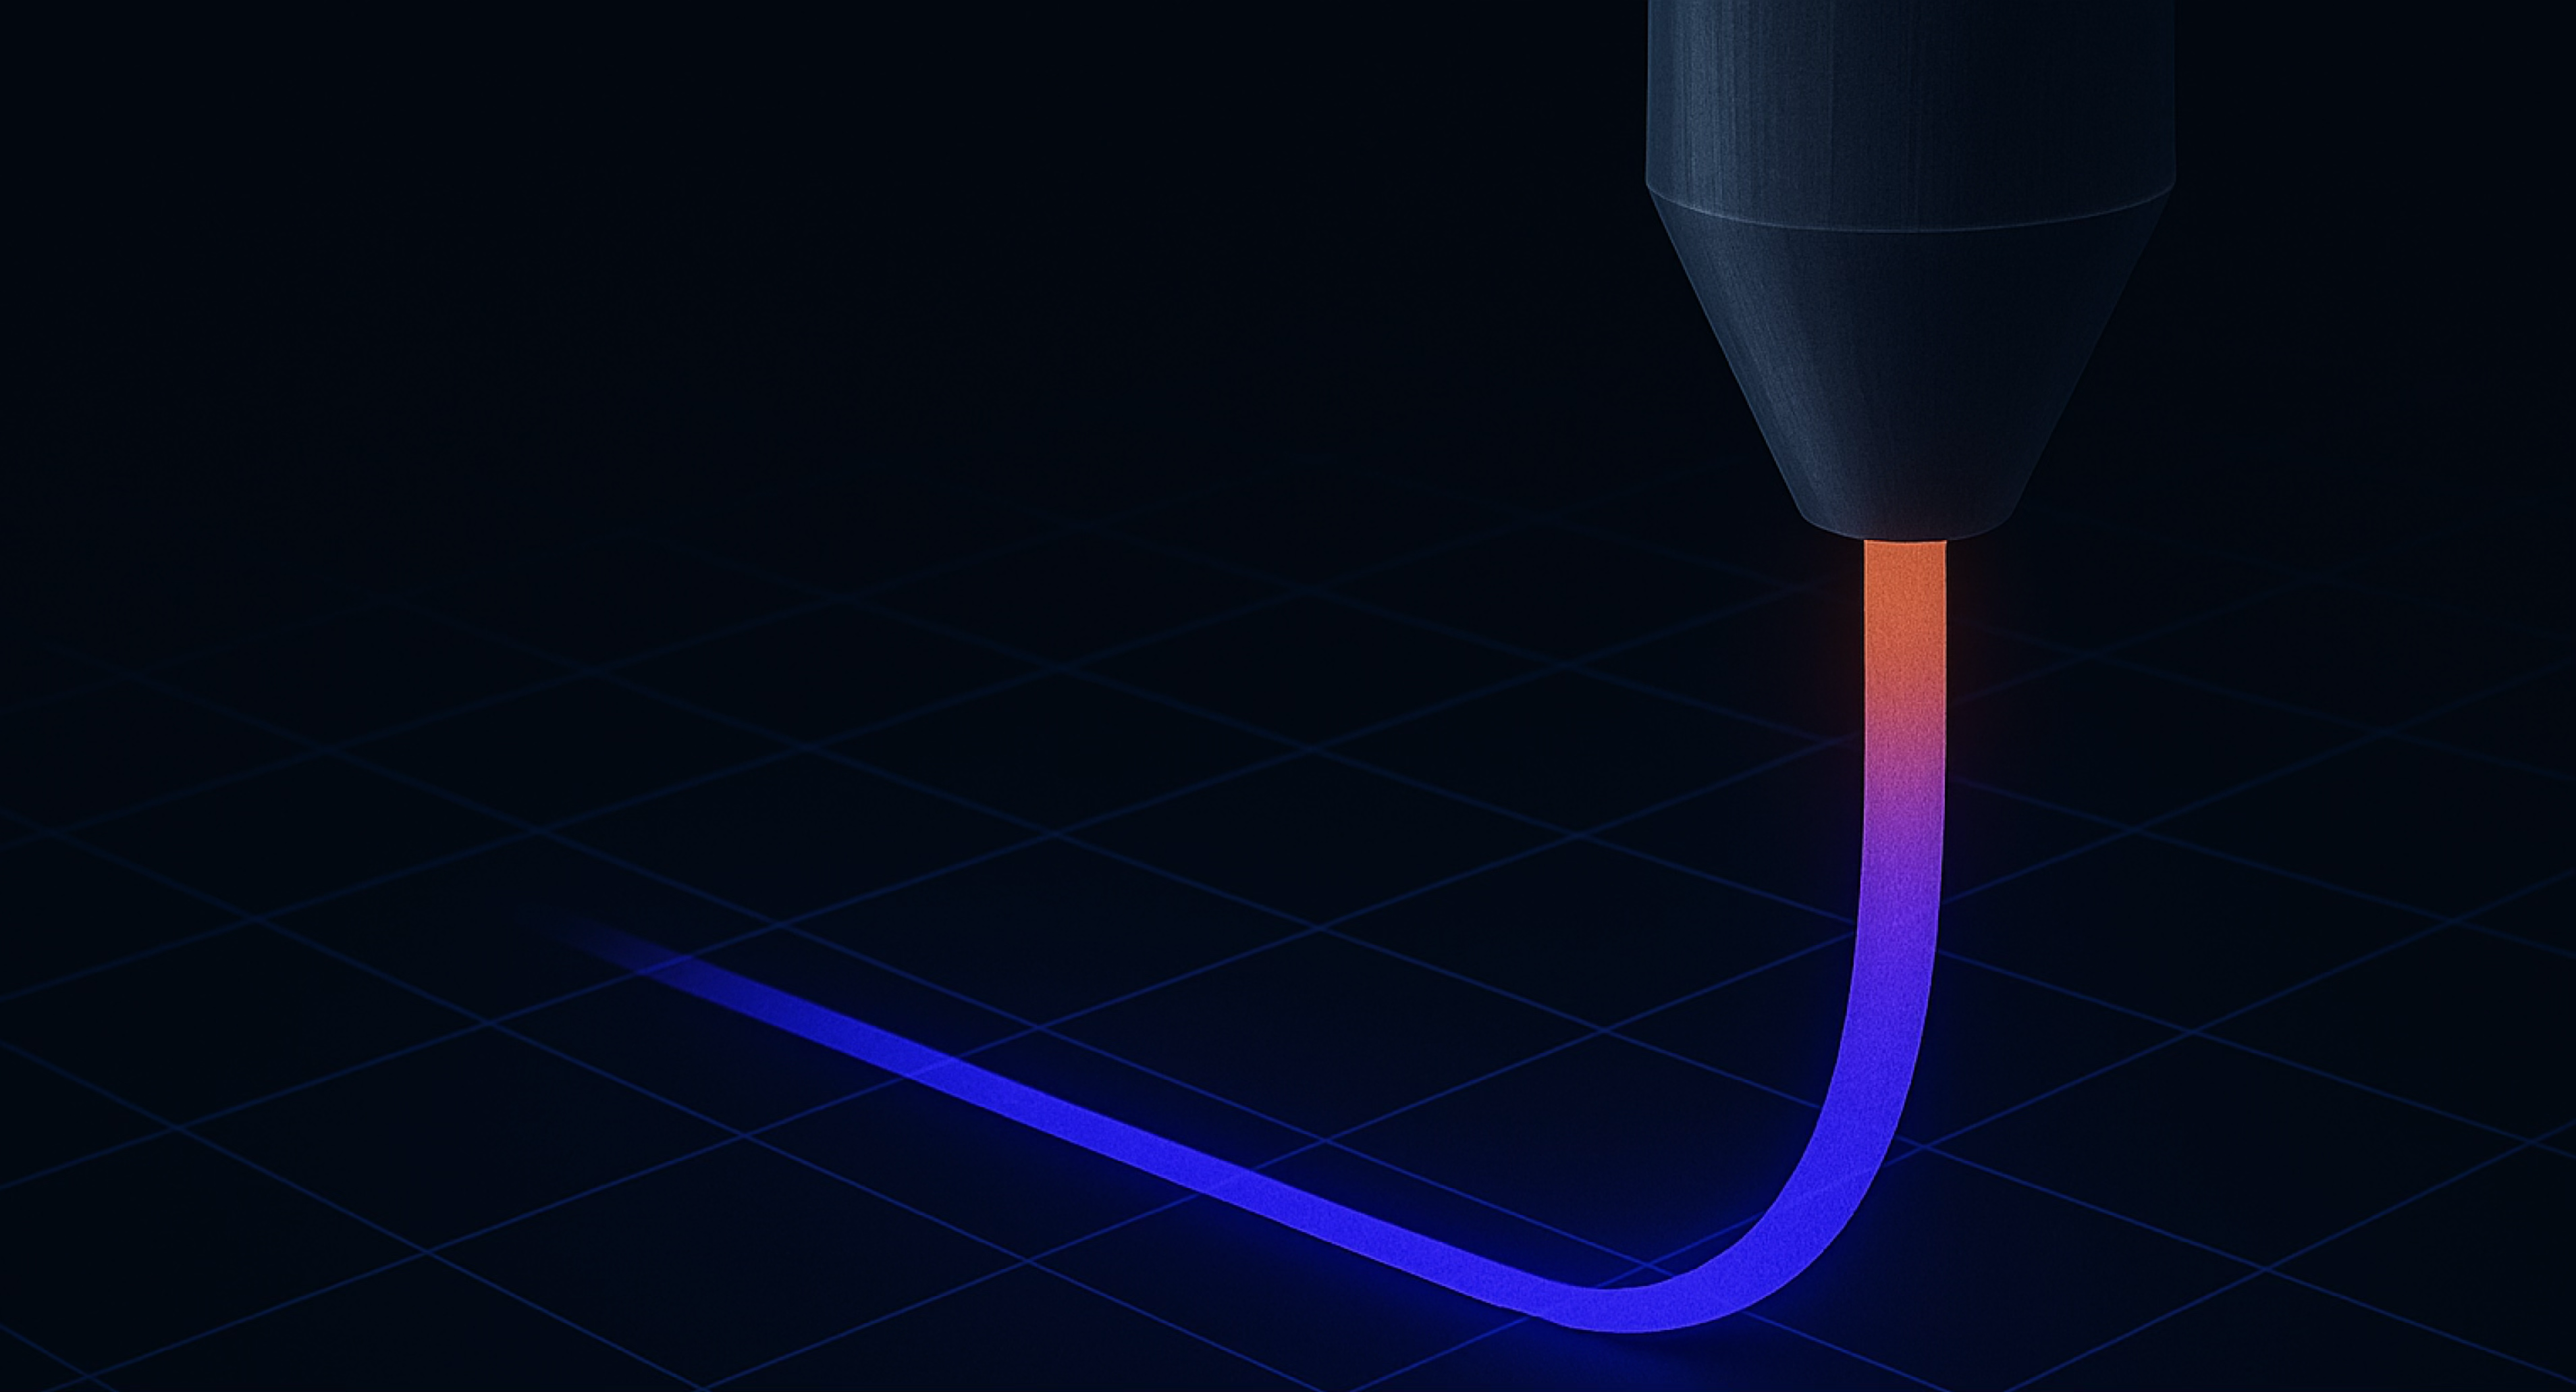
In FFF/FDM printing, you aren’t placing “cold plastic.” You’re repeatedly heating, depositing, and cooling polymer. That temperature history changes how the material behaves: how well layers fuse, how much it shrinks, and where stresses build up.

If it stays too hot
You risk sagging, dimensional drift, surface issues, and localized deformation.
If it cools too fast
You risk weak bonding between layers and brittle behavior—especially in short layers and small features.
If it cools unevenly
You risk warping, curling, and internal stress that shows up later.
Infographic showing a part point and its temperature-versus-time thermal history curve.
Temperature over time for representative part locations (for example, a thin wall versus a thicker region), with the polymer’s workable window marked so it’s clear when each region is above or below it.
Slicer view showing a predicted thermal index heat map across a part with a legend scale.
A part-level temperature heat map showing hotter and cooler regions, illustrating how geometry, layer time, and cooling conditions shape where thermal risk accumulates.

Step 1 — A physics model (not guesswork)

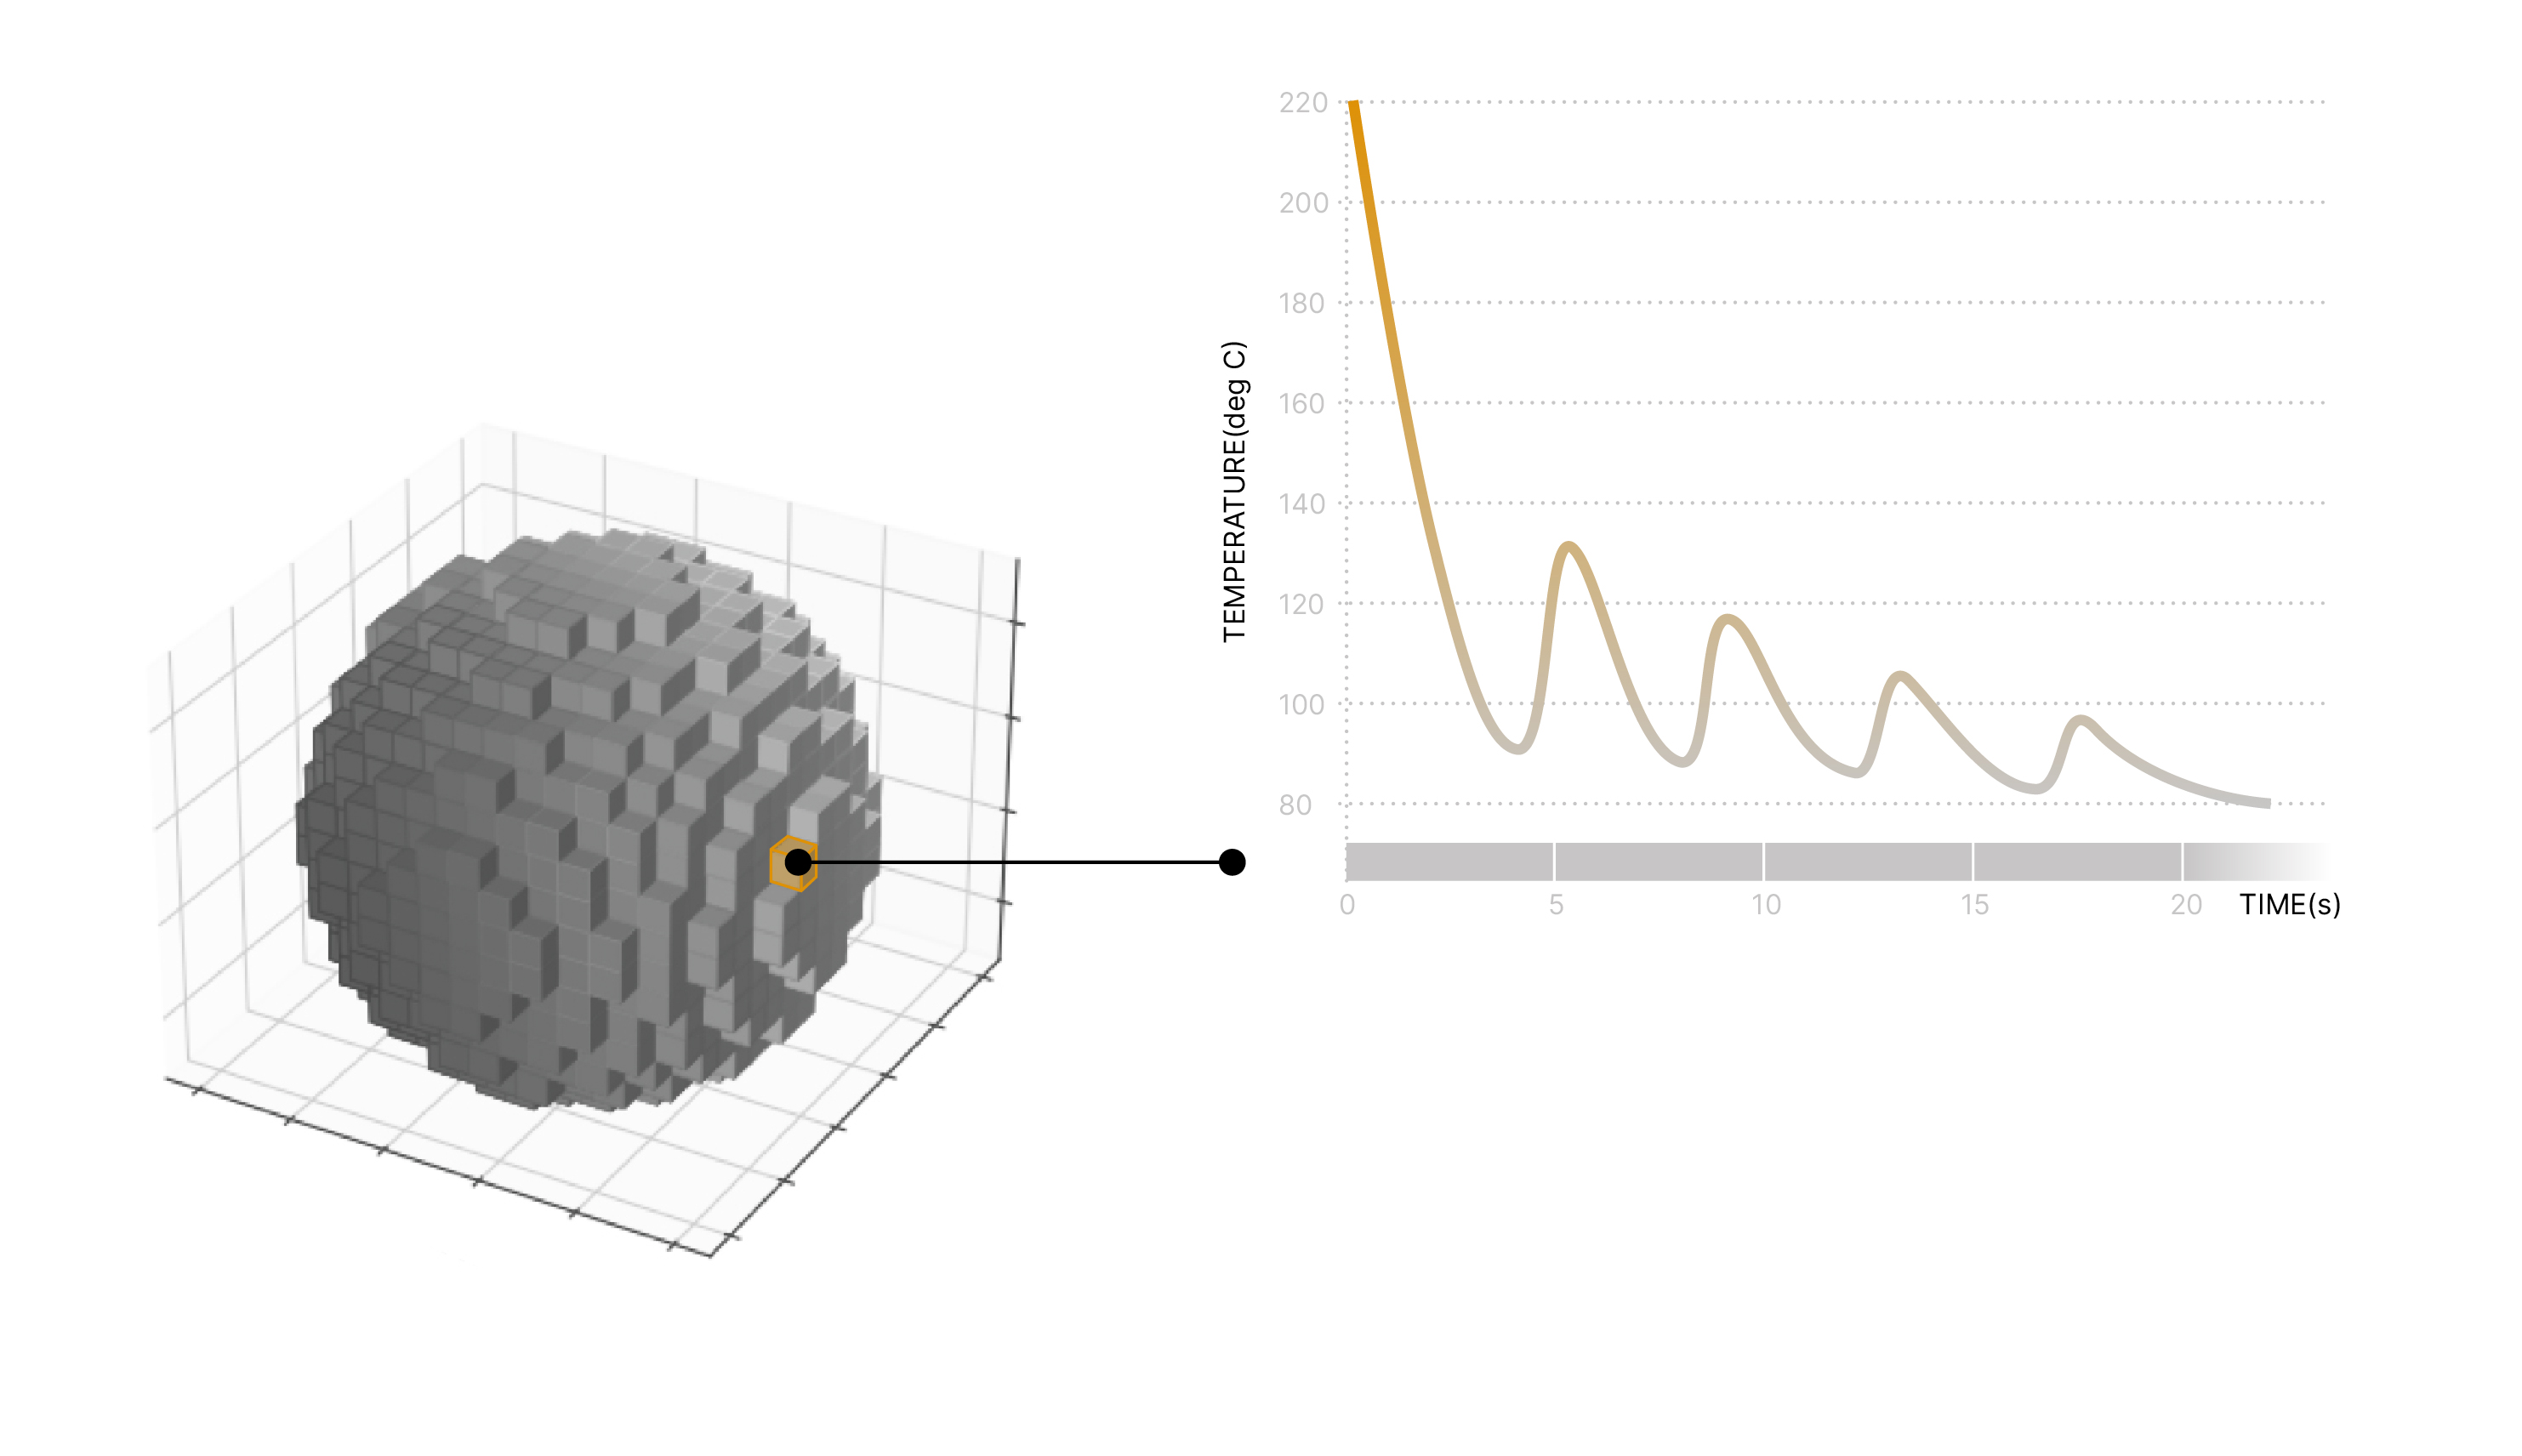
Helio uses a first‑principles, physics-based thermal model to estimate how heat moves through the part as the printer lays down material. You can think of it like a weather forecast for temperature inside your print: not perfect, but grounded in physics and much more reliable than trial-and-error.

  • We track how each new line adds heat, and how the part loses heat over time.
  • We account for geometry (thin vs thick regions cool differently).
  • We identify zones where the process is trending toward over-heating, over-cooling, or uneven cooling.

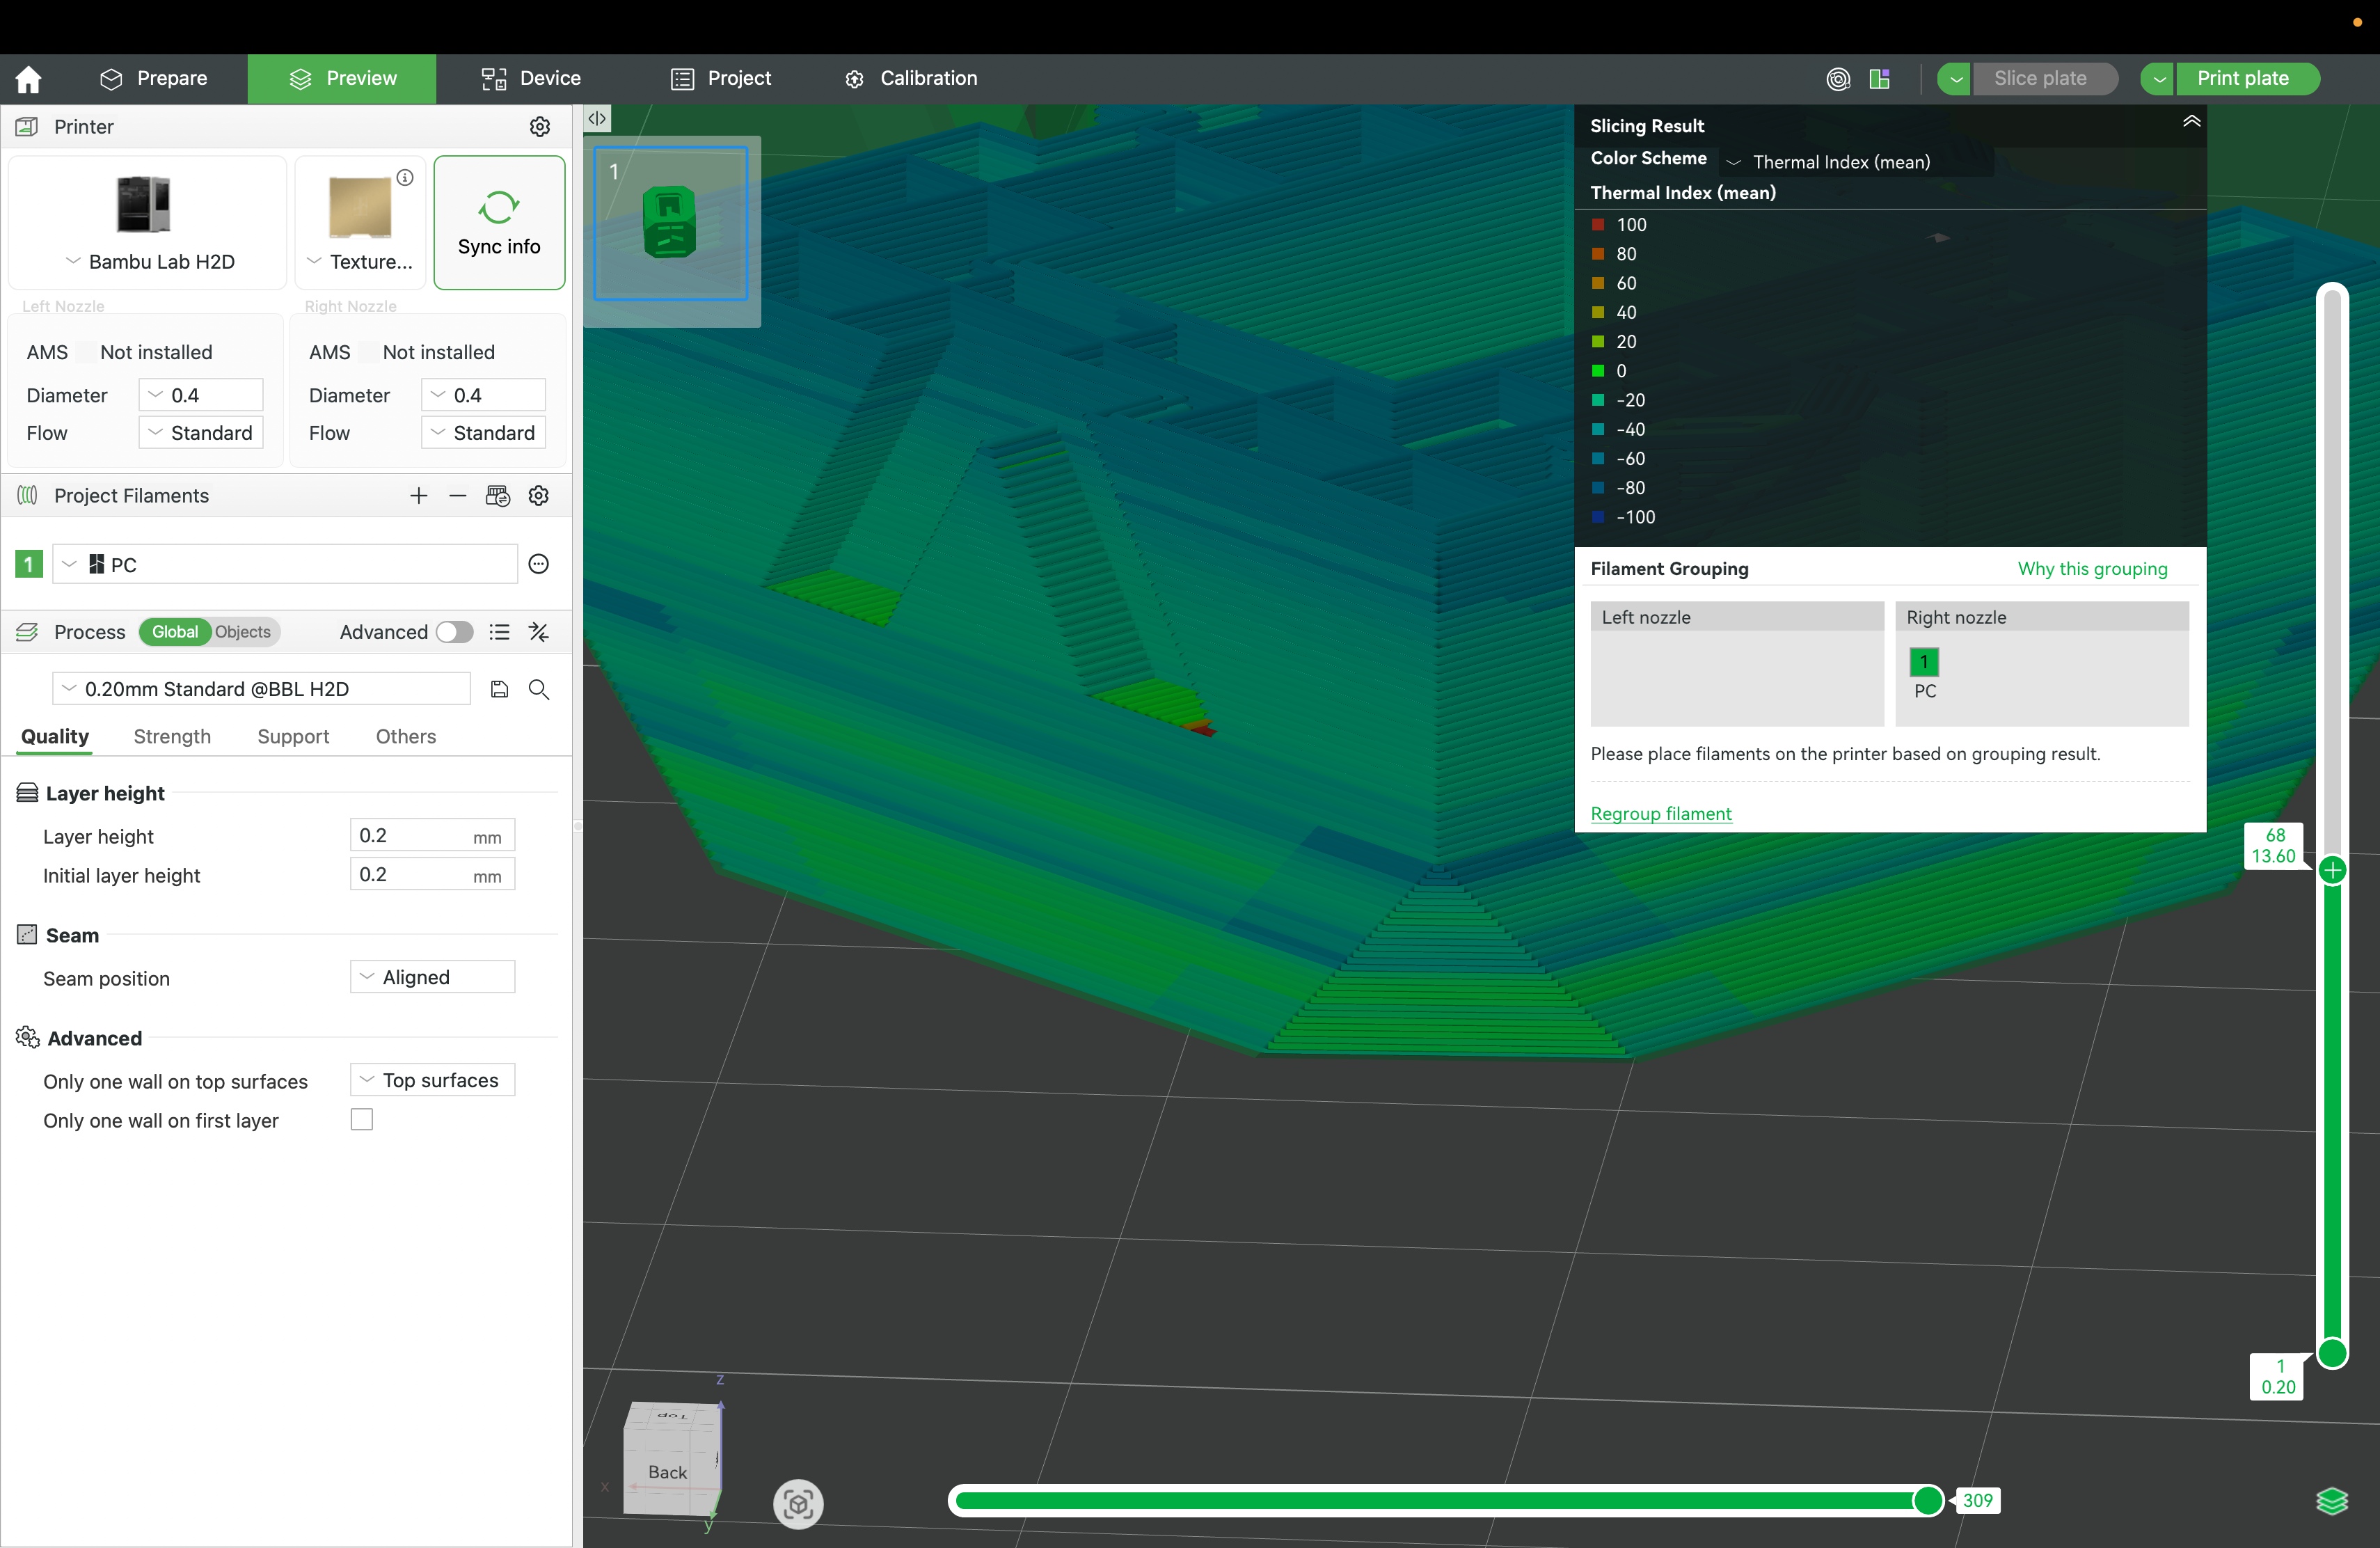
Step 2 — Simulation turns that into a map of risk

Once we can predict the temperature history, we can flag where the print is likely to struggle: areas that may warp, areas that may not bond well, or areas that are likely to drift dimensionally.

Why this matters
Most “mysterious” print failures are actually predictable once you understand the thermal story of the part. Simulation makes that story visible before you commit hours of machine time.

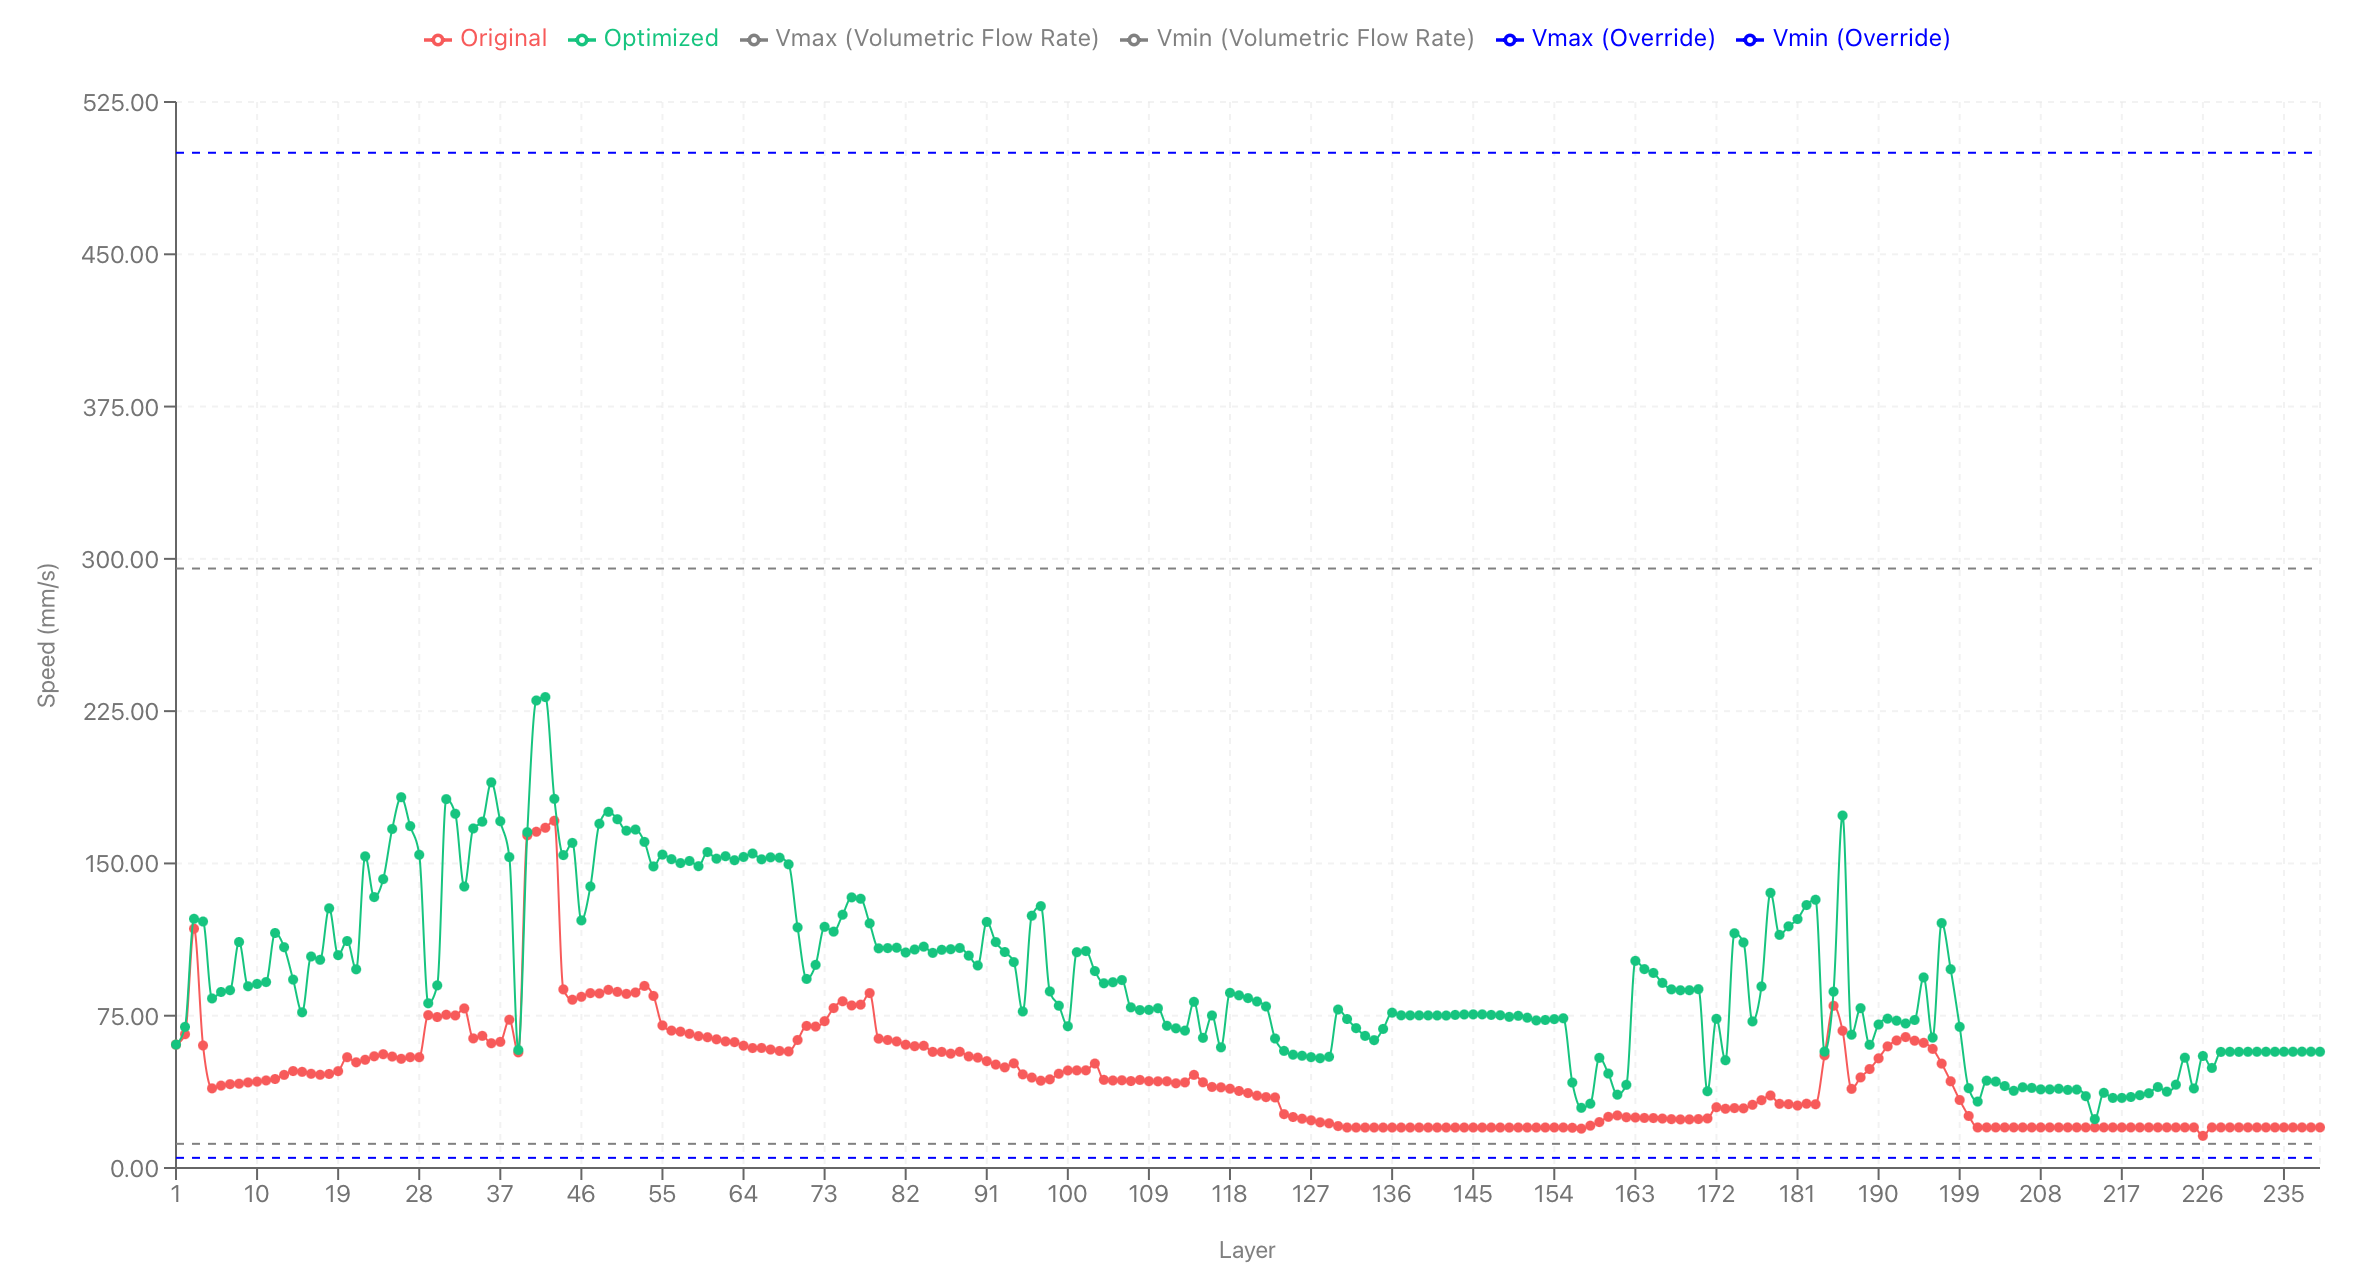
Step 3 — Optimization: go faster without breaking the thermal “rules”

If you only push speed, you often create thermal problems (too hot in some areas, too cold in others). Helio’s optimization searches for print speeds for each road that respects the thermal constraints while still reducing total print time.

  • Speed up where the part can safely accept more heat.
  • Slow down or add time where cooling/bonding needs it.
  • Avoid “ping-ponging” between extremes that cause inconsistency.
You’ll hear us talk about “layer time” a lot: it’s simply how long the printer spends on a layer before moving on. Layer time controls cooling, which controls thermal history.
Layer speed and layer-time behavior across print layers, comparing original vs Helio-optimized settings.
Helio optimization reshapes layer-time and speed behavior across the part: it speeds up where the thermal model shows headroom, and slows down where bonding/cooling needs more time—reducing risk while cutting total print time.

What you get in the slicer

The end result is practical: clearer confidence before you print, and a print plan that’s tuned to your part’s thermal reality.

Predictability
See where risk is building (overheating, overcooling, uneven cooling) before you waste time and material.
Speed with guardrails
Reduce print time while keeping thermal conditions in a workable range.
Less tuning
Fewer cycles of “try a setting and hope,” especially for harder materials and complex geometries.

A few simple definitions

Polymer physics (in this context)
How plastic changes when it’s heated and cooled: viscosity (flow), bonding, shrinkage, and stress.
Thermal history
The temperature story at each point in the part over time (heat added, heat lost, and how fast it changes).
Simulation
A physics-based prediction of temperature over time and across the part.
Optimization
Automatically adjusting the print plan so it stays within thermal constraints while improving speed and consistency.
Want to try it on your workflow?
Start with a quick setup, then explore products and examples.
For deeper technical docs and guides, see the Helio Additive Wiki .